All Categories
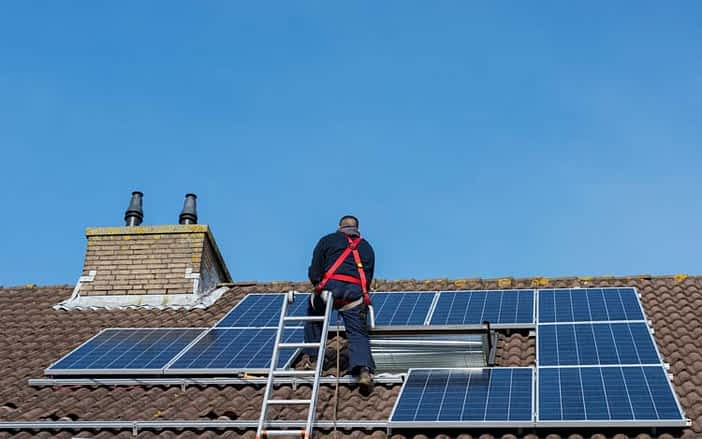
The construction and installation of a solar system consists of four steps. First, the statics of the roof are checked, then the modules are installed. The installation depends on the type of roof and solar modules. Then the cables are laid, the inverter is installed and the system is connected to the grid.
As a rule, the statics of most pitched roofs sufficientto install a photovoltaic system on it. However, it should not be neglected under any circumstances. Professional photovoltaic specialist companies Therefore, check the statics of the roof before installing the PV system and carry it out already in their offer When building a new house, the PV system can easily be factored in, which is why there are no problems.
A PV module has a weight of about 16 to 24 kilogramsMost roofs hold this extra weight because they are built with a power reserve. However, there are additional loads due to wind, rain and snow. Is the photovoltaic site in an area particularly affected by wind or snow, you should always hire a structural engineer.
At flat roofs it becomes a little more difficult. The solar modules are mostly weighted downto withstand the wind load. If the statics do not allow this, a type of installation must be chosen in which the roof skin is brokento anchor the modules. If the work is done sloppily, leaks can occur. Water will penetrate. Therefore, hire only qualified specialist companies for the implementation.
At solar thermal systems In any case, you should seek advice from an expert. The systems are smaller, but significantly heavier than PV modules. In addition, solar thermal systems require larger openings through the roof, since instead of solar cables pipes have to be relocated.
The roof covering plays no role in the statics. It only affects on the type of installation of the solar modules. Installation is possible on almost any roof coveringIt is easiest to do with tiled roofs, but sheet metal and metal roofs are also suitable. With Eternit roofs, installation is a little more complex.
The installation of the PV modules differs depending on the type of installation and roof. For pitched roofs, there are two mounting options. On-roof installation and in-roof installation. For flat roofs, frames must be used for the modules.
The roof-mounted installation is the most popular and widely used type of photovoltaic installation. The PV system is simply placed on the roof. small distance for roof covering. Roof hooks are used for fastening. They penetrate the roof covering and are anchored in the roof beams.

support structure of the modules. This consists of aluminum rails. The rails are slightly inclined customizable and can therefore be better aligned to the sun. Before photovoltaic modules are inserted into the rails, solar cable Each solar module is connected with cables that run to the inverter Only then can the PV modules be inserted and connected with terminals.
The places where the roof skin was penetrated for the roof hooks and the wiring should be well sealed against moisture Otherwise moisture can penetrate.
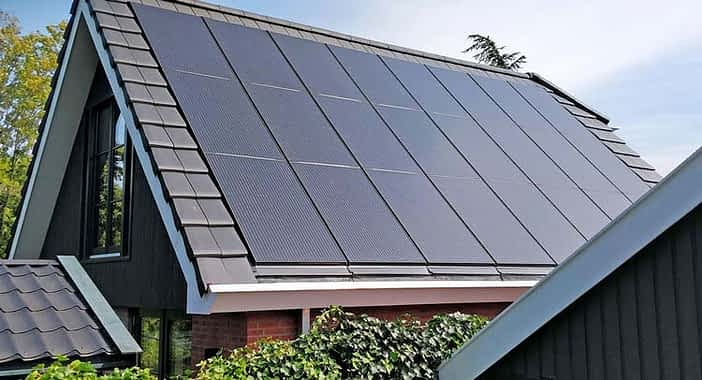
At the in-roof installation The solar system is integrated into the roof covering, and the roof covering is completely or partially replaced by PV modulesIn this way, the modules and the rest of the roof covering form a uniform and homogeneous image. The modules also take on the protective function of the roof.
Here too, the PV modules are again aluminum rails These rails are screwed directly onto the roof beams and are therefore not adjustable in inclinationA film is glued under the modules to seal the roof against moisture.

In-roof photovoltaics (@Vidirian Solar)
flat roof
Installation on the flat roof is always carried out using a elevation of the solar modules. This support frame is weighted to withstand the wind. The modules are placed in the frame inserted with clampsThe system is also known as ballasting system designated.
If the statics of the roof cannot bear the additional weight, there is the possibility of the support frame to be fastened with screwsFor this, the roof skin is penetrated and the screws are screwed into the beams. However, the individual frames can also be screwed together and on the outside of the roof be attached.
Proper wiring of the modules is extremely important to fire and moisture damage This also guarantees the service life of the cables for at least 30 years. Cables that are too short are permanently under tension and cables that are too long are subject to friction and can damaged become.
Depending on the type, the PV modules are series or parallel The cables should be attached to the modules using weather- and UV-resistant cable ties. For some types of modules, rails for cable storage to protect them from water. The cables of the connected solar modules are then routed in a DC line to the inverter.
The inverter is usually mounted on the wall. The specified distancee to ceiling, floor and other objects should must be strictly adhered to. The feed-in meter should also be close to avoid transmission loss. The ambient temperature of the inverter should be low as it itself waste heat produced when converting electricity.
The connection to the house electricity and the public power grid may only be carried out by a certified electrician Don't take any risks and only work with qualified specialist companies. Click this link and we will help you find a professional solar installer.
PV systems are usually connected to the public grid in order to feed excess electricity. In the Power grid must be clearhow much is fed in and consumed at any given time. To do this, you must Contact network operator and him the performance data Your PV system. The grid operator will tell you whether the system can be connected at all and whether you changes have to make.
To ensure that the grid operator is always aware of the electricity quantities, a smart PV meter installed. The connection to the public network is usually carried out by the commissioned installer or a registered electrician carried out.
A solar system you can theoretically install it yourselfHowever, you should have the ability of a carpenter, roofer and electrician If you are not familiar with one of these professions, you should rather photovoltaic installer commission. The saved assembly costs are the money that is lost through serious Mistake and loss of income occurs, not worth itIn case of incorrect installation, the warranty claimA specialist company will also support you in the correct planning and dimensioning of the system.
The installation costs for photovoltaic systems are included in the offer and usually correspond 10% to 20% of the total costsFor single-family homes, the costs are 150 € to 200 € per kWp installed capacity. However, depending on the type of installation, hourly wage and the local conditions and the respective roof, there are differences.
The installation of a solar system takes on average 2 to 3 days. With a normal rooftop PV system less than 10 kWp requires the module installation a working dayFor the electrical installation, a another day For in-roof systems, installation may take longer as more time is needed for the correct sealing. Another working day is required if the roof previously covered must be.
Theoretically, it is possible to assemble and install your own PV system. But at the latest when connection to the house's electricity system you must hire an electrician. The installation costs of a photovoltaic system on your own roof you should not saveIf you are not a roofer or carpenter, it can quickly lead to damage to the statics or leaks in the roof If you are not an electrician, it can cable fires, overvoltages and power loss come.
No account yet?
Create an AccountCongratulations, you have been hit by the lucky ball! Our discount spots are limited and only available while stocks last.